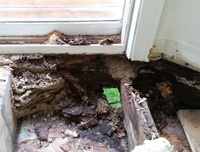
 The most critical concern while installing the ledger board should be how to prevent water from entering the seams into the house. You will have to install ledger board flashing also known as a drip edge to act as a barrier to keep water out. If water can penetrate into the house framing it can result in severe mold, decay, and overall serious and expensive damage. After you have cut the siding but before you install the ledger board you must apply your flashing. To install flashing you will need to tuck 2-3″ under the house siding before bending the material over the top of the ledger board. You may have to remove nails in the siding to allow the flashing into place. Make sure the flashing runs the entire length of the ledger board.
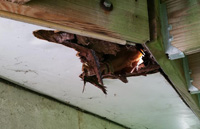 Once the ledger board flashing is in place behind the siding you can install the ledger board underneath. Afterwards you can use a wood block and a hammer to bend the flashing over the ledger board to form the drip edge. Use silicone caulking to seal the end butt joints and any places where water might intrude. Make sure that you overlap and seal any seams with 6-10″ of overlap and that you never allow the flashing to become punctured by nail and screw holes. In areas where there will be significant amounts of rain and snow you may want to line the house wall with a bituminous house wrap like Tyvek before installing the flashing for an extra layer of protection. Some deck builders also install a layer of flashing to the bottom of the ledger board. This is not required but offers an additional barrier for water that could flow into the house underneath the ledger board.Water it seems can get into anyplace that is not appropriately sealed.
Types of Deck Ledger Board Flashing
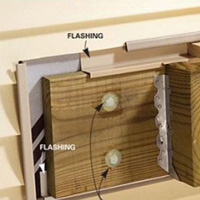 You can buy flashing either in roll form or in rigid Z or L shaped 10′ sheets made of stainless steel, copper or vinyl material. Never use galvanized steel or aluminum flashing in contact with an acq pressure treated wood ledger board because it will corrode. Vinyl flashing may not work as well in area with extreme temperature fluctuations. If you are installing copper flashing from a roll make sure you use copper nails to secure it into place to prevent corrosion. Copper works well because it is compatible with the chemicals used in commonly sold acq treated lumber and is easy to bend. Because flashing comes in different widths make sure your flashing will be the right size to tuck up behind the house siding at least a couple of inches. We recommend that you install a bead of silicon caulk to fill any openings.
My existing deck’s ledger board doesn’t have ledger board flashing? What should I do?
The lack of flashing above a ledger is a very upsetting situation. When it comes to water damage turning to rot in wood materials, getting wet is not the problem… it’s not being able to dry that creates havoc. In the case of the ledger sans flashing, the ledger is the visible part, but also that part that can dry. While everything may appear okay from a view of the ledger, the framing of your home may be rotting apart. This condition can cause significant damage to the home that can rival the cost of the new deck.
If you’re rebuilding your deck, then without any question, it’s time to pull that ledger and see what has not been seen in years. Any damage to the home should be promptly and properly repaired before construction of the new deck, with a flashed ledger, begins. If the deck appears to have life left in it, and the lacking flashing was discovered during an annual inspection (recommended), then some repair should be on your to do list. Though it will take some dismantling, and perhaps a replacement deck board or stick of siding, following the recommended practices for installed ledger flashing based on your exterior cladding is the best approach. If you’re just trying to buy a few years until a new deck can be built, some tubes of high-quality silicone caulk and whatever other tricks it takes to divert water to the face of the ledger can buy you some time. Perhaps. It just depends on what damage is already done.
Installing a deck ledger board around vents, pipes, and spigots
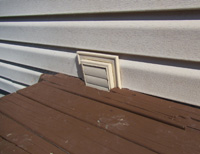
In some cases you may have vents, pipes, and spigots from furnaces, dryers, and water heaters in the way of your ledger board attachment. You have a few options to avoid these obstacles.
The easiest method is to install the ledger board around the vents by breaking the ledger board into smaller sections. You may need to adjust your joist spacing so that a joist doesn’t fall on a vent. The ledger board doesn’t have to be one continuous board.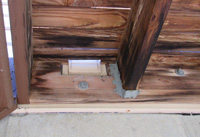 It can be series of broken sections if it is solidly attached. This will require extra bolts and installing a 2x nailer across the top of the vent to secure the decking along the house wall.
The second method is to cut holes in the ledger board around the vents with a jig saw. This is more difficult than simply breaking the ledger board.
If the joists will fall on the vents you will need to box frame around the vents. To do this you will need to run a double joist on both sides of the vent and run a double header in between to pick up the intermediate joists. Double joist hangers should be used to secure the H frame around a vent.
